top of page
Patron thank you (mobile website)_edited.jpg

WRITINGS

Original Fiction, Fan Fiction, & Blog Archive

Nov 13-20 Weeks left- 13


Greetings from the shop! This week has been about gathering more reference shots, talking with friends who have already built parts of the Cyberman before and understanding patterns.  We are definitely getting somewhere! We decided that this first helmet would be a prop that Jo could use for her cosplay (more on that later) and so if it’s a little banged up or there are obvious mistakes that would be okay.  I can’t tell you how freeing it is to be like “This is the test run. Don’t worry about supplies. Don’t worry about fully getting it right. Just understand the process better and you’ve won.” 


Had a great big friend greet me in the shop this week. Everyone, this is Appa! Appa is the size of a miniature pony. 


Such a sweet heart!  


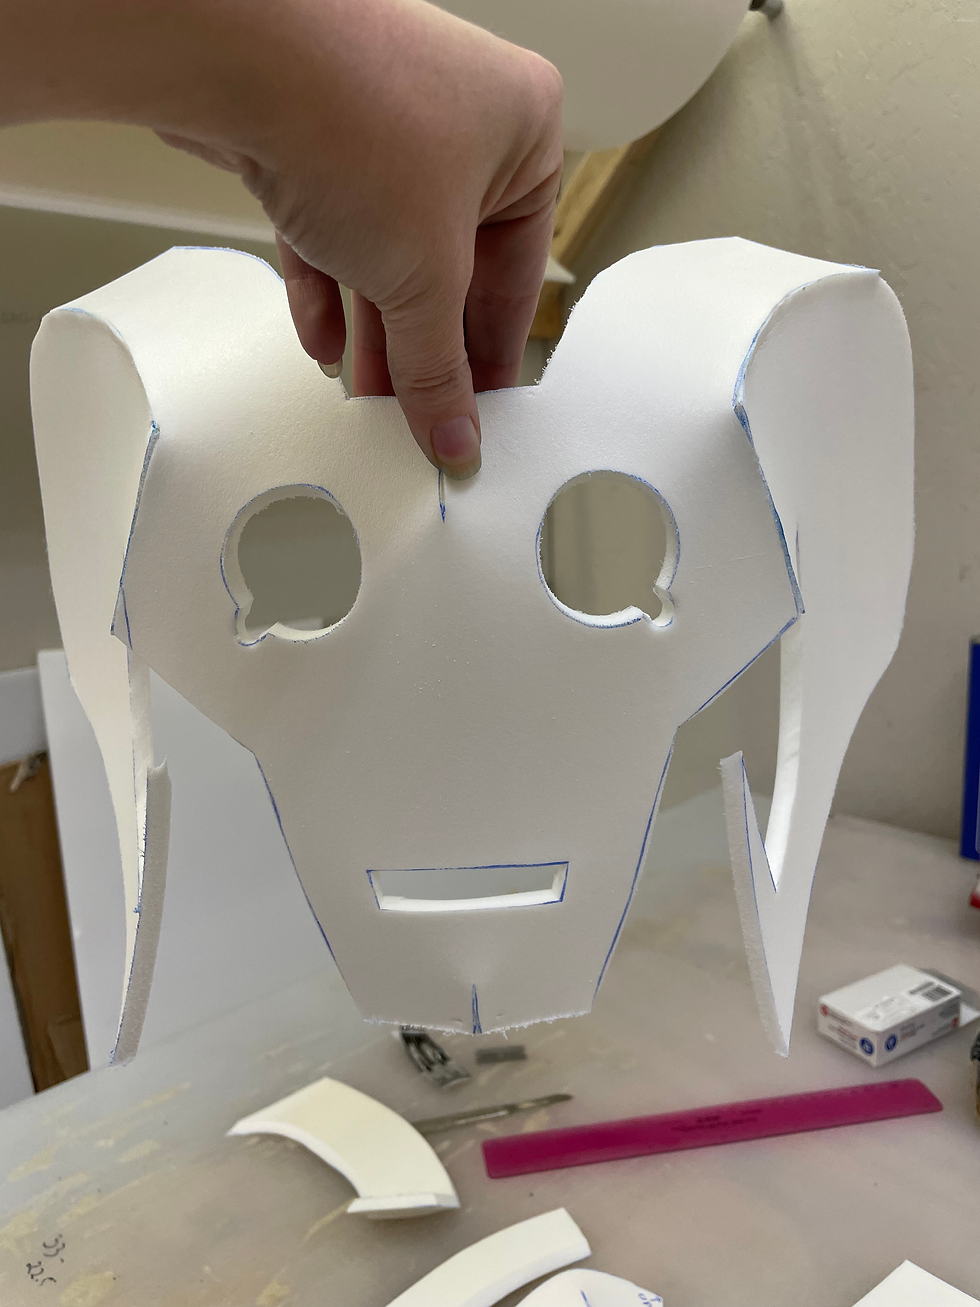
We continued our work on the helmet and started to get every piece put together and began the glue process. There was also discussion about how this Cyberman helmet is different than the one I would need to be wearing for the Cybermaster leader. It’s good to already be aware of the differences that would need to be made.  


When we ended our work in the shop, I noticed we didn’t get too far.  While we had plans for other parts of the cosplay, the helmet was looking more like an Aries mask than a Cyberman.  Maybe they are related somehow? Or one evolved from the other?? I digress. I knew there was more that had to be done.  Not only that, but the foam I was using was becoming convex on the sides around the cheek area.  Luckily, the foam I am using is malleable to heat but it was going to need some coaxing.


I took all the pieces home and talked to a friend about her build of the same helmet.  We got on a video chat and she was very patient with me as I slowly asked her which piece was what, and went where. Once I better understood what each part was for, I grabbed a test piece of foam.  I wanted to check different glues with this foam, how Plastidip held to it, and I want to practice the engravings of circular gallifreyan that will be all over the piece. I also coaxed the foam to shape around a head and bend the appropriate way so we wouldn’t have so much of an issue. 


I found out the dremel was going to be too hard to control in those circles and the wood burning tool I have does a pretty good job but adds weird bumps while it is burning away the foam.  I got one more idea at the end of the week to try an artists’s engraving tool so I ordered one to try this next week.


I’m starting to pick up momentum going into this next week.  Theoretically, I have more time to work on this project than I normally would (days off work), but I also have engagements (Thanksgiving) that I need to go to as well.  I’m staying positive and hoping to get more done!


Stay Mythic out there Geeks!

Nov 6-13.  Weeks left:14


This is going to be an ongoing blog about my new cosplay. If you love cosplay, making things, Doctor Who, or all of the above, this blog is for you! In February I will be headed to a Doctor Who convention and, of course, I became extremely ambitious yet again and wanted to make myself a new cosplay.  This, however, wouldn’t be any cosplay. I have decided that I want to dress up as a Cyberman. Not just ANY Cyberman; the Cyber Master Leader.


For those not in the know, Cybermen are a common reoccuring villain in the Doctor Who franchise.  The concept is easy; people lose their individuality and get “Upgraded’ into the hive mind of these Cybermen. They are a robotic race. Over the course of the show, there have been many different versions of the Cybermen. The Cyber Master Leader is the most recent version.


When it comes to constructing and fabricating this piece, a few things were obvious; we are going to need a lot of foam and a LOT of time. There are 14 weeks until the con and many many parts that need to be made. Helmet,“collar”, chest piece, corset,  pauldrons, bracers, gloves, codpiece, tassets, grieves, and boots.  There is some light work (LED work maybe) in two places, and then my favorite part: all of the Circular Gallifreyan! Those circles, dots and lines are the language of the Timelords; something I have spent over a decade learning, writing, and teaching others how to write (yes, I’m that nerd). There is also the problem of having a voice changer so I sound more robotic. It’s a lot on my plate.


I spoke to my friends about helping out. You can’t do all of this alone! I reached out to a fellow cosplayer known for his work in making Cybermen. He was more than gracious enough to let me use past patterns that he already made.  This is a huge leg up in the to do list.  If I don’t have to make a pattern, but just need to modify it, This moves me up two or three weeks into my schedule.  I also spoke with my friend who loves fabricating new cosplays and happens to have a shop with space and sanders and whatnot that we can work together at least once a week. I brought over the patterns and some foam and we were off.


Being met by two cute dogs at the  shop door, we decided to make one of the helmets to get an idea of how the patterns work. “But Shawna,” you may think, “you are wasting time making something you might not even use!” Perhaps, but I’m hoping to make most of my mistakes and learn from this piece. After an hour or so, we had traced, cut, and beveled all of the helmet pieces, lots of conversation was had, and naturally the dogs were tuckered out.  And so was I.


There is a lot left to do, and not a ton of time left to do it. But as the Doctor has been known to say, “Time is not the boss of you.” 

Anyone who’s DM’d Curse of Strahd (CoS) knows that Castle Ravenloft is a BEAST. Not only is it a dangerous hellscape for your party of PCs, but it can be a nightmare for any DM to try and navigate this epic and confusing castle.


I was blessed (er…cursed) enough last November to run a weekend-long marathon Castle-Only campaign, and I needed a map that I could UNDERSTAND. Unfortunately, there was no such map, so I made one myself. I took the map illustrations in the book, and then added notes and color-coded arrows to show how one stairwell leads to another. It helped me SO much, and I hope it helps you too!


Castle Ravenloft map edited by Joanna S Dunlap

bottom of page